Loma Agent Claude Academy เรียนจาก 0 ถึงใช้ Plugins ได้จริง From zero to plugin workflows
school Online Learning Path for Claude

เรียน Claude ตั้งแต่ศูนย์ จนติดตั้ง Plugins และใช้ทำงานจริง

หลักสูตรนี้ออกแบบให้คนเริ่มใหม่เข้าใจ Claude อย่างเป็นระบบ: รู้ว่า Claude ทำอะไรได้, คุยอย่างไรให้ได้ผล, ติดตั้ง Claude Code, วาง Plugins ให้ถูกที่ และนำ slash commands, agents, skills ไปใช้กับงานประจำวัน

9บทเรียนเรียงตามลำดับ
3ระดับ: พื้นฐาน ติดตั้ง ใช้งานจริง
1Checklist ส่วนตัวในเครื่องคุณ
ภาพประกอบคอร์สเรียน Claude และ Plugins
psychology เริ่มจากแนวคิดClaude คืออะไร ใช้ต่างจาก search อย่างไร Foundation
terminal ติดตั้งเครื่องมือClaude Code, API key, project setup Setup
extension ใช้ Pluginscommands, agents, skills และ workflow Practice
flag Learning Outcomes

จบคอร์สนี้แล้วควรทำอะไรได้บ้าง

เป้าหมายไม่ใช่แค่ติดตั้งให้ผ่าน แต่ต้องเข้าใจวิธีคิด วิธีใช้ และวิธีควบคุมคุณภาพงานที่ Claude ช่วยทำ

question_answer

คุยกับ Claude เป็น

ตั้งโจทย์ ใส่บริบท ขอรูปแบบผลลัพธ์ และตรวจคำตอบได้โดยไม่หลงกับคำตอบที่ดูดีเกินจริง

build_circle

ติดตั้ง Claude Code

เตรียมเครื่อง เปิดใช้งานในโปรเจกต์ และเข้าใจขอบเขตการแก้ไฟล์/รันคำสั่งอย่างปลอดภัย

extension

ลง Plugins ถูกโครงสร้าง

เข้าใจโฟลเดอร์ .claude, slash commands, agents, skills และเลือกติดตั้งแบบ project/global ได้

task_alt

ใช้กับงานจริง

ทำ workflow เช่นสรุปเอกสาร เขียน content ช่วย dev ตรวจโค้ด วางแผนงาน และสร้าง template ซ้ำใช้ได้

map Curriculum

แผนการเรียนที่เหมาะกับผู้เริ่มต้น

แบ่งเป็น 3 ช่วง เพื่อให้ไม่กระโดดจาก “ยังไม่รู้ Claude คืออะไร” ไปสู่ “ติดตั้ง plugin” เร็วเกินไป

auto_awesome Course Insights

แนวคิดสำคัญที่ควรรู้ก่อนลงมือใช้ ClaudeCore ideas to understand before using Claude

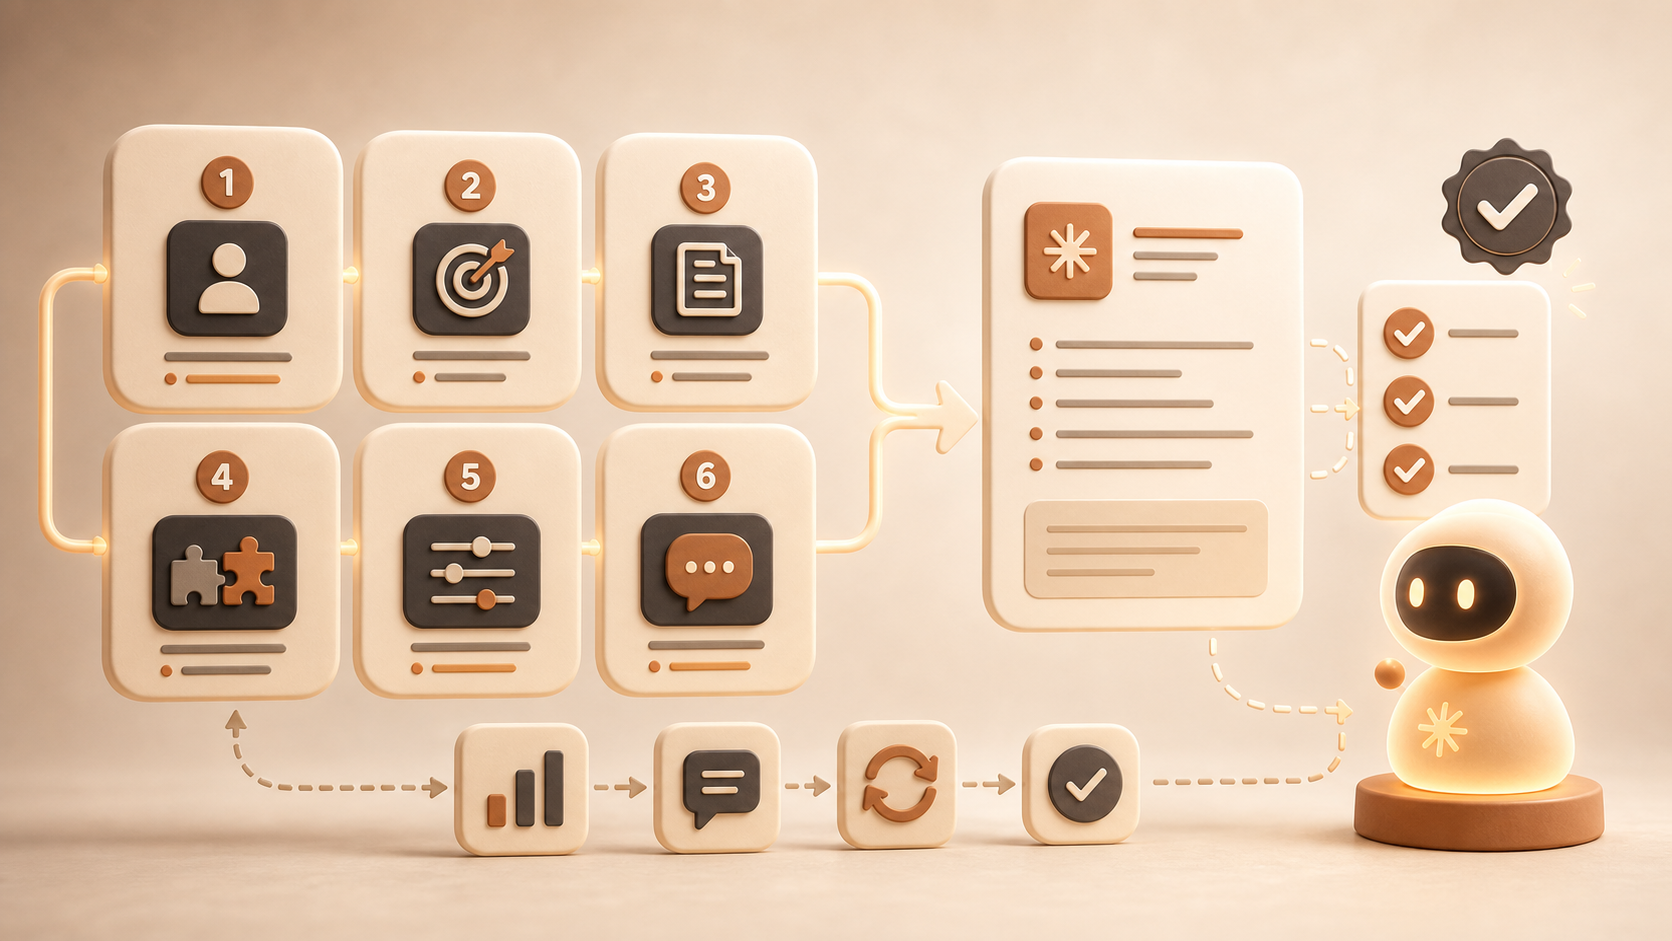
ส่วนนี้สรุปหลักคิดที่ใช้ตลอดคอร์ส เพื่อให้เข้าใจว่าทำไม prompt framework, context และ plugin จึงช่วยให้ Claude ทำงานแม่นขึ้นและใช้ซ้ำได้มากขึ้นThese cards summarize the principles used throughout the course: prompt frameworks, context, and plugins make Claude more reliable and reusable.

ภาพรวมชุด Plugin สำหรับ Claude

Claude เก่งขึ้นเมื่อมีระบบClaude improves with structure

ผู้เริ่มต้นมักใช้ Claude แบบถามตอบทั่วไป แต่บทเรียนนี้จะพาไปสู่การใช้บริบท กฎ และ workflow ที่ทำซ้ำได้Beginners often use Claude as a simple chat. This course moves you toward reusable context, rules, and workflows.

ภาพปลดล็อกการใช้ Claude ด้วย Plugins

Plugins คือ shortcut ของทีมPlugins are team shortcuts

แทนที่จะพิมพ์ prompt ยาวทุกวัน ให้เก็บวิธีทำงานที่ดีเป็น command, agent และ skill เพื่อเรียกซ้ำได้Instead of retyping long prompts, store proven workflows as commands, agents, and skills.

ภาพลดเวลาทำงานด้วย Plugin

เป้าหมายคือเวลาที่ได้คืนThe goal is time returned

งานที่ใช้เวลานานเพราะต้องจัดรูปแบบ วิเคราะห์ซ้ำ หรือเขียน draft ซ้ำ เหมาะมากสำหรับแปลงเป็น plugin workflowWork that repeats formatting, analysis, or drafting is ideal for plugin workflows.

extension Plugin Anatomy

Plugin หนึ่งชุดควรประกอบด้วยอะไรWhat a useful plugin pack contains

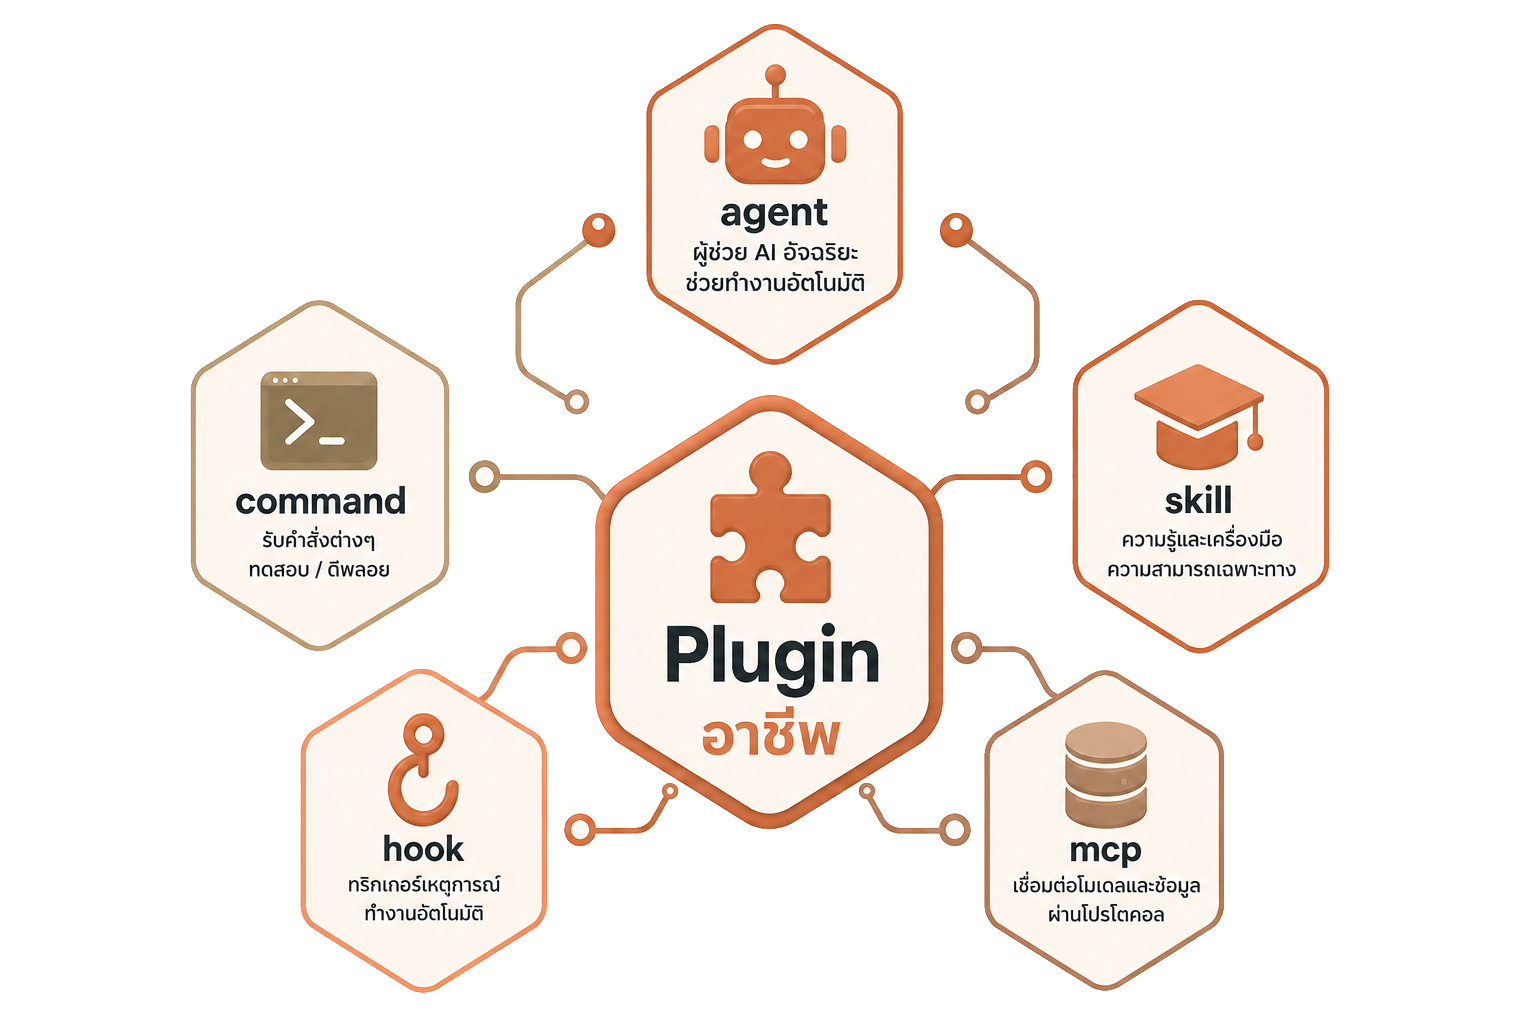
Plugin ที่ดีควรมีบทบาท คำสั่ง ความรู้ประกอบ และจุดเชื่อมต่อที่ชัดเจน เพื่อให้ทีมเรียกใช้ workflow เดิมซ้ำได้อย่างสม่ำเสมอA useful plugin needs clear roles, commands, supporting knowledge, and integration points so teams can reuse workflows consistently.

support_agent

Agent

ผู้ช่วยเฉพาะทาง เช่น reviewer, strategist, trainer ที่มีบทบาทและมาตรฐานงานชัดA specialist assistant with a clear role and quality bar.

bolt

Command

คำสั่งสั้นสำหรับเรียก workflow เช่น review, blog post, meeting summaryA short trigger for a reusable workflow.

menu_book

Skill

คู่มือหรือความรู้เฉพาะงานที่ Claude อ่านก่อนลงมือทำTask-specific instructions Claude reads before acting.

account_tree

Hook

จุดเชื่อมขั้นตอน เช่น ก่อนส่งงานให้ตรวจ checklist หรือหลังแก้ไฟล์ให้สรุป diffA trigger point that enforces process steps.

hub

MCP

การเชื่อมต่อเครื่องมือหรือแหล่งข้อมูลภายนอก เมื่อ workflow ต้องใช้ข้อมูลจริงA bridge to external tools or data sources.

route Learning Paths

เลือกเส้นทางตามงานของคุณChoose a path by your role

หลังเรียนพื้นฐานเดียวกันแล้ว ผู้เรียนแต่ละบทบาทควรฝึก workflow ต่างกัน เพื่อให้เห็นประโยชน์จริงเร็วที่สุดAfter the shared foundation, each role should practice different workflows to see value quickly.

campaign

Marketing / Content

เหมาะกับการสร้าง brief, outline, long-form draft, social captions และ SEO checklistBest for briefs, outlines, long-form drafts, social captions, and SEO checks.

  • /blog-post
  • /content-calendar
  • /social-caption
code

Developer / Product

เหมาะกับอ่าน codebase, แก้ bug เฉพาะจุด, review diff, สรุป PR และเขียน test checklistBest for codebase reading, scoped fixes, diff reviews, PR summaries, and test checklists.

  • /explain-codebase
  • /review
  • /release-note
support_agent

Sales / Support

เหมาะกับจัดหมวด ticket, draft คำตอบ, สรุป pain point และเขียน follow-up emailBest for ticket triage, response drafts, pain-point summaries, and follow-up emails.

  • /ticket-summary
  • /customer-reply
  • /sales-followup
inventory_2 Download Pack

ไฟล์ประกอบคอร์สที่พร้อมใช้งานCourse files ready to use

บทเรียนนี้ออกแบบให้เรียนคู่กับไฟล์จริงในชุด LOMA-AGENT.zip: มีทั้ง plugin ตามสายงาน, template สำหรับเริ่มโปรเจกต์ enterprise และเอกสาร COURSE-DOCS สำหรับทำตามหลังดาวน์โหลดThis course is designed around the real LOMA-AGENT.zip package: role-based plugins, an enterprise project template, and COURSE-DOCS for post-download guidance.

ดาวน์โหลด LOMA-AGENT.zip แล้วเรียนตามบทติดตั้งได้ครบขั้นตอนDownload LOMA-AGENT.zip and follow every setup step

ดาวน์โหลดชุดไฟล์ประกอบคอร์ส แล้วใช้เรียนตามบทติดตั้งได้ต่อเนื่อง ภายในมี Plugin Pack, Enterprise Template และ COURSE-DOCS สำหรับฝึกกับไฟล์จริงDownload the course package and follow the setup lessons end to end. It includes the Plugin Pack, Enterprise Template, and COURSE-DOCS for hands-on practice.

info แนะนำให้ดาวน์โหลดไฟล์ก่อนเริ่มบทติดตั้ง เพื่อทำตามตัวอย่างได้ต่อเนื่องตั้งแต่บท 05 เป็นต้นไป Download the package before starting the setup lessons so you can follow the examples from lesson 05 onward.
ภาพประกอบชุดดาวน์โหลด LOMA-AGENT สำหรับเรียน Plugins และ Template
download_for_offline LOMA-AGENT.zip
folder_zip
extensionPlugin packages พร้อมติดตั้ง
dashboard_customizeEnterprise template สำหรับเริ่มโปรเจกต์
menu_bookCOURSE-DOCS พร้อม checklist และ guide
schoolใช้ประกอบบทเรียน 05-08

extension LOMA-AGENT-PLUGIN

ชุด plugin ตามอาชีพที่ build เป็นโครงสร้าง Claude Plugin พร้อมใช้งานRole-based Claude plugin packages built into installable plugin structure.

  • 15 หมวดอาชีพ เช่น Developer, Marketing, UX, HR, Sales, Web3, AI Specialist
  • มี agents, commands, skills, hooks, .mcp.json, .claude-plugin/plugin.json
  • ใช้กับบทเรียน Plugin Anatomy และบทติดตั้ง Project/Global

dashboard_customize LOMA-AGENT-TEMPLATE

Enterprise Genesis Template สำหรับสร้างโปรเจกต์จริงพร้อม stack/preset/theme และ workflow เริ่มต้นEnterprise Genesis template for real projects with stack, preset, theme, and starter workflows.

  • รองรับ Next.js, Angular, NestJS, .NET, Prisma, Docker, observability และ validators
  • มี project.config.json, _init.ps1, _init.sh, docs, runbook และ Day-1 smoke test
  • ใช้กับบท Practice Lab เพื่อสร้าง workflow/โปรเจกต์แรกหลังเรียนจบ
menu_book Lessons

บทเรียนทั้งหมด

แต่ละบทมีเนื้อหา สรุปสิ่งที่ต้องรู้ แบบฝึกหัด และ checklist เพื่อให้เรียนแล้วลงมือทำทันที

00
Foundation

รู้จัก Claude: AI assistant ที่ควรใช้แบบมีบริบท

Claude คือ AI assistant จาก Anthropic ที่เด่นเรื่องการอ่านบริบทยาว การเขียน การวิเคราะห์ และการช่วยคิดเป็นขั้นตอน แต่ยังต้องมีมนุษย์ตรวจคำตอบเสมอ

ภาพประกอบการให้บริบทกับ Claude อย่างเป็นระบบ

แนวคิดสำคัญ

  • Claude ไม่ใช่ search engine แบบดั้งเดิม แต่เป็นผู้ช่วยที่สังเคราะห์คำตอบจากบริบทและความรู้ที่มี
  • ผลลัพธ์จะดีขึ้นเมื่อคุณบอกเป้าหมาย ผู้ฟัง ข้อจำกัด รูปแบบคำตอบ และตัวอย่างที่ต้องการ
  • งานที่เหมาะ: สรุปเอกสาร เขียน draft วิเคราะห์ requirement ช่วยเขียนโค้ด ตรวจ checklist และออกแบบ workflow
  • งานที่ต้องระวัง: ข้อมูลล่าสุด กฎหมาย การเงิน แพทย์ รหัสลับ ข้อมูลลูกค้า และคำตอบที่ต้องอ้างอิงแหล่งจริง

เลือกงานให้เหมาะกับ Claude

summarize
งานอ่านและสรุป

ให้ Claude ช่วยจับประเด็น เปรียบเทียบ สรุป decision/action item และจัดโครงข้อมูลจากเอกสารยาว

edit_note
งานเขียนร่าง

เหมาะกับ brief, outline, email, proposal, release note หรือ draft แรกที่ยังต้องให้คนตรวจ tone และความถูกต้อง

fact_check
งานตรวจคุณภาพ

ใช้เป็น checklist reviewer ให้ช่วยหา gap, assumption, risk และจุดที่ควรตรวจซ้ำจากแหล่งจริง

sync_alt
งานที่ทำซ้ำ

ถ้ามีขั้นตอนเดิมซ้ำทุกสัปดาห์ ให้เก็บเป็น prompt template หรือ plugin workflow ในบทถัดไป

ฉันอยากเริ่มใช้ Claude กับงานนี้: งาน: ข้อมูลที่มี: ผลลัพธ์ที่ต้องการ: ข้อห้าม/ข้อมูลที่ห้ามใช้: ช่วยบอกว่างานนี้เหมาะกับ Claude แค่ไหน ต้องเตรียมบริบทอะไร และควรตรวจอะไรหลังได้คำตอบ
tips_and_updates
หลักคิดก่อนเริ่ม

ให้ Claude ทำงานเหมือน junior partner ที่เร็วและอ่านเก่ง แต่คุณยังเป็นคนกำหนดมาตรฐาน ตรวจทาน และตัดสินใจขั้นสุดท้าย

science Practice Lab

Lab 00: เลือกงานแรกที่เหมาะกับ ClaudeLab 00: Choose your first Claude-ready workflow

เปลี่ยนไอเดียกว้าง ๆ ให้เป็น workflow แรกที่มีบริบท ข้อจำกัด และเกณฑ์ตรวจชัดเจนก่อนเริ่มใช้จริงTurn a broad idea into a first workflow with clear context, constraints, and review criteria before real use.

1

ลิสต์งานที่ทำซ้ำ 5 งาน แล้วเลือก 1 งานที่มี input/output ชัดที่สุดList 5 repeatable tasks and choose the one with the clearest input/output.

2

เขียนข้อมูลที่ต้องให้ Claude, สิ่งที่ห้ามใช้ และวิธีตรวจคำตอบหลังได้ outputWrite the context Claude needs, blocked information, and how you will review the output.

3

Expected output: รายการ workflow แรก 1 งาน พร้อม context checklist และ risk ที่ต้องตรวจExpected output: one first workflow with a context checklist and risks to verify.

done_all สรุปบทนี้Lesson Summary

  • Claude เหมาะกับงานที่มีบริบท มีเป้าหมาย และต้องการร่าง/สรุป/ตรวจคุณภาพClaude works best on tasks with context, a clear goal, and a need for drafting, summarizing, or review.
  • ข้อมูลล่าสุดหรือข้อมูลเสี่ยงต้องตรวจซ้ำจากแหล่งจริงก่อนใช้งานFresh facts and risky information still need source verification.
  • เริ่มจาก workflow ที่ทำซ้ำและมี input/output ชัดเจนStart with repeatable workflows that have clear inputs and outputs.
01
Account Setup

สมัครและตั้งค่า Claude ให้พร้อมใช้งาน

ก่อนใช้ Claude หรือ Claude Code ควรมีบัญชีที่ชัดเจน เลือก plan ให้เหมาะ และแยก workspace ส่วนตัว/ทีมเพื่อลดความสับสน

สิ่งที่ควรตั้งค่าตั้งแต่วันแรก

  1. สมัครบัญชีด้วยอีเมลที่ใช้ทำงาน และเปิดการยืนยันตัวตนตามที่ระบบรองรับ
  2. ตรวจ plan ว่ารองรับฟีเจอร์ที่ต้องใช้ เช่น Claude Code, API, project, file upload หรือ context ขนาดใหญ่
  3. ตั้งชื่อ workspace/team ให้ชัด เช่น 4Tech Claude Lab หรือ Marketing Claude Workflow
  4. กำหนดกติกาข้อมูล: อะไรส่งเข้า Claude ได้ อะไรห้ามส่ง เช่น secret, token, ข้อมูลส่วนบุคคล, สัญญาที่ยังไม่อนุญาต

ตรวจความพร้อมของบัญชี

person
Identity

ใช้อีเมลงานหรือบัญชีทีม ตรวจ recovery method และเปิดการยืนยันตัวตนตามนโยบายองค์กร

verified_user
Plan

เช็กว่าต้องใช้ Claude Code, file upload, Projects, API หรือ team management แล้วเลือก plan ให้ตรงงาน

folder
Workspace

แยกพื้นที่ส่วนตัว ทีม และลูกค้า ไม่ปนไฟล์ทดลองกับไฟล์งานจริง เพื่อให้ context ไม่สับสน

policy
Policy

กำหนดสิ่งที่ส่งได้ ส่งไม่ได้ ผู้ตรวจคำตอบ และช่องทางขออนุมัติเมื่อ workflow ใช้ข้อมูลอ่อนไหว

AI Usage Policy v1 Allowed data: Blocked data: Required review: Owner: Exception process: Last reviewed:
security
ข้อควรระวัง

อย่าวาง API key, password, access token หรือข้อมูลลูกค้าที่อ่อนไหวลงใน prompt โดยตรง หากจำเป็นต้องใช้ข้อมูลจริงให้ทำ masking ก่อน

science Practice Lab

Lab 01: ตั้งค่าบัญชีและกติกาการใช้ข้อมูลLab 01: Configure account and data rules

ทำให้บัญชีพร้อมใช้จริง แยก workspace ให้ชัด และเขียนกติกาข้อมูลฉบับสั้นที่ทีมอ่านแล้วทำตามได้Prepare the account for real work, separate workspaces clearly, and write a short team data policy.

1

เปิด Claude/Console แล้วตรวจบัญชี, plan, recovery method และ workspace ที่จะใช้เรียนOpen Claude/Console and check the account, plan, recovery method, and learning workspace.

2

เติม template AI Usage Policy v1 ให้ครบ allowed data, blocked data, reviewer และ ownerComplete the AI Usage Policy v1 template with allowed data, blocked data, reviewer, and owner.

3

Expected output: policy 1 หน้า และ checklist ว่าบัญชีพร้อมใช้ Claude/ConsoleExpected output: a one-page policy and a checklist proving Claude/Console readiness.

done_all สรุปบทนี้Lesson Summary

  • บัญชี, plan และ workspace ต้องแยกให้ชัดก่อนเริ่มใช้กับทีมAccounts, plans, and workspaces should be clear before team use.
  • นโยบายข้อมูลช่วยลดความเสี่ยงเรื่อง secret และข้อมูลลูกค้าA data policy reduces risk around secrets and customer data.
  • เตรียม Console สำหรับงาน API แยกจากการใช้งาน Claude ทั่วไปPrepare Console access separately from general Claude usage when API work is needed.
02
Prompting

Prompt พื้นฐาน: สูตรคุยให้ได้คำตอบดี

Prompt ที่ดีควรบอกบทบาท เป้าหมาย บริบท ข้อจำกัด รูปแบบ output และเกณฑ์ตรวจงาน เพื่อให้ Claude ไม่ต้องเดามากเกินไป

ภาพประกอบสูตร Prompt Framework สำหรับคุยกับ Claude

สูตร Prompt 6 ส่วน

  1. Role: ให้ Claude รับบท เช่น ที่ปรึกษา, editor, senior engineer, trainer
  2. Goal: ระบุผลลัพธ์ที่ต้องการ เช่น “สรุปเป็นแผน 7 วัน”
  3. Context: ใส่ข้อมูลประกอบ เช่น กลุ่มเป้าหมาย ข้อจำกัด งบ เวลา
  4. Input: วางเนื้อหาหรือไฟล์ที่ต้องใช้วิเคราะห์
  5. Output format: ขอเป็นตาราง checklist JSON หรือ bullet ที่ชัด
  6. Quality bar: บอกให้ระบุสมมติฐาน ความเสี่ยง และคำถามที่ยังไม่รู้
คุณคือ trainer ที่สอนผู้เริ่มต้นใช้ Claude เป้าหมาย: สร้างแผนเรียน 5 วันสำหรับทีม content บริบท: ทีมไม่เคยใช้ AI มาก่อน ใช้เวลาวันละ 45 นาที รูปแบบคำตอบ: ตาราง Day / Objective / Exercise / Output เกณฑ์คุณภาพ: ต้องมีแบบฝึกหัดจริงและข้อควรระวังเรื่องข้อมูลลับ

Prompt pattern ที่ควรฝึก

compare_arrows
Compare

ใช้เมื่อมีหลายทางเลือก ให้ Claude เทียบข้อดี ข้อเสีย ความเสี่ยง และเงื่อนไขที่เหมาะกับแต่ละทาง

rule
Checklist

ใช้แปลงความรู้เป็นรายการตรวจ เช่น launch checklist, review checklist หรือ security checklist

psychology
Critique

ให้ Claude วิจารณ์ draft, หา gap, ถามคำถามกลับ และเสนอ revision โดยไม่เขียนใหม่ทันที

table_chart
Structured output

ขอผลลัพธ์เป็นตาราง JSON หรือ schema ที่นำไปใช้ต่อได้ ลดการแก้ format ซ้ำ

ช่วยเปรียบเทียบ 3 ทางเลือกนี้ในรูปแบบตาราง: ตัวเลือก: เกณฑ์ตัดสินใจ: ข้อจำกัด: ให้สรุป recommendation พร้อม assumption, risk และคำถามที่ควรถามเพิ่ม
verified
วิธีตรวจคำตอบ

ถามต่อว่า “มีสมมติฐานอะไรในคำตอบนี้”, “ส่วนไหนควรตรวจจากแหล่งจริง”, และ “ถ้าต้องทำให้สั้นลง 30% จะตัดอะไร”

science Practice Lab

Lab 02: สร้าง prompt 6 ส่วนจากงานจริงLab 02: Build a 6-part prompt from real work

ฝึกเปลี่ยนโจทย์งานจริงให้เป็น prompt ที่มี role, goal, context, input, output format และ quality bar ครบPractice turning a real task into a prompt with role, goal, context, input, output format, and quality bar.

1

เลือกงานจริง 1 งาน แล้วเขียน prompt 6 ส่วนโดยไม่ใส่ข้อมูลลับChoose one real task and write a 6-part prompt without secrets.

2

ให้ Claude critique prompt ก่อน แล้วปรับจน output format และเกณฑ์ตรวจชัดAsk Claude to critique the prompt first, then refine the output format and review criteria.

3

Expected output: prompt v2 พร้อม assumption, risk และคำถาม follow-up อย่างน้อย 3 ข้อExpected output: prompt v2 with assumptions, risks, and at least 3 follow-up questions.

done_all สรุปบทนี้Lesson Summary

  • Prompt ที่ดีควรมี role, goal, context, input, output format และ quality barStrong prompts include role, goal, context, input, output format, and quality bar.
  • เลือก pattern ให้ตรงงาน เช่น compare, checklist, critique หรือ structured outputChoose patterns that fit the task: compare, checklist, critique, or structured output.
  • คำถาม follow-up ช่วยตรวจ assumption, risk และความถูกต้องFollow-up questions help inspect assumptions, risks, and accuracy.
03
Claude Code

ติดตั้ง Claude Code สำหรับทำงานกับโปรเจกต์

Claude Code คือเครื่องมือ CLI ที่ช่วยอ่านโปรเจกต์ แก้ไฟล์ รันคำสั่ง และทำงานร่วมกับโค้ดหรือเอกสารใน workspace ได้เป็นระบบ

ภาพประกอบการติดตั้ง Claude Code และเตรียมโปรเจกต์

Prerequisites ก่อนติดตั้ง

ก่อนลงคำสั่งติดตั้ง Claude Code ให้เตรียมพื้นฐานเหล่านี้ก่อน เพื่อลดปัญหา permission, path, shell และบัญชีไม่พร้อมระหว่างทำตามบทเรียน

account_circle
บัญชีและสิทธิ์ใช้งาน

มีบัญชี Claude หรือ Anthropic Console ที่ sign in ได้ และรู้ว่าจะใช้ plan/API แบบใดกับ Claude Code

terminal
Terminal พื้นฐาน

เปิด terminal ได้, รู้จัก cd, pwd/dir, copy path และเปิดจาก root โปรเจกต์

code
Editor และโปรเจกต์

มี VS Code หรือ editor ที่ใช้จริง พร้อมโฟลเดอร์โปรเจกต์ตัวอย่างสำหรับทดลองแบบไม่กระทบงาน production

policy
สิทธิ์ติดตั้งซอฟต์แวร์

เครื่องต้องอนุญาตติดตั้ง CLI/extension และถ้าเป็นเครื่ององค์กรควรเช็ก policy ก่อนลง package manager

priority_high
เช็กก่อนรันคำสั่ง

ถ้าไม่แน่ใจว่า terminal เปิดอยู่ในโฟลเดอร์ไหน ให้หยุดแล้วรัน pwd หรือ cd ไป root โปรเจกต์ก่อนเสมอ เพื่อป้องกันติดตั้งหรือ copy plugin ผิดที่

ขั้นตอนติดตั้งโดยรวม

  1. เตรียมบัญชี Claude หรือ Anthropic Console ให้พร้อม และเลือกวิธี login ให้ตรงกับ plan/API ที่ใช้
  2. ตรวจเครื่อง: macOS 13.0+, Windows 10 1809+/Server 2019+, Ubuntu 20.04+, Debian 10+ หรือ Alpine Linux 3.19+
  3. ถ้าติดตั้งผ่าน npm ต้องมี Node.js 18+ และ package manager ต้องโหลด optional dependencies ได้
  4. หลังติดตั้งให้รัน claude doctor เพื่อตรวจสภาพแวดล้อมก่อนใช้งานจริง

แถบคำสั่งติดตั้งตามระบบปฏิบัติการ

แนะนำ: ใช้ native installer ผ่าน PowerShell/CMD หรือ WinGet บน Windows หากต้องใช้ toolchain แบบ Linux ให้ติดตั้งผ่าน WSL แทน

# Option 1: PowerShell native installer irm https://claude.ai/install.ps1 | iex # Option 2: CMD native installer curl -fsSL https://claude.ai/install.cmd -o install.cmd && install.cmd && del install.cmd # Option 3: WinGet winget install Anthropic.ClaudeCode # Option 4: npm install npm install -g @anthropic-ai/claude-code # If using Git Bash, set bash path when needed $env:CLAUDE_CODE_GIT_BASH_PATH="C:\Program Files\Git\bin\bash.exe" claude doctor claude

แนะนำ: ใช้ native installer เป็นหลัก หรือ Homebrew/npm หากองค์กรจัดการแพ็กเกจด้วยเครื่องมือเหล่านี้อยู่แล้ว

# Option 1: native installer curl -fsSL https://claude.ai/install.sh | bash # Option 2: Homebrew brew install --cask claude-code # Option 3: npm install npm install -g @anthropic-ai/claude-code claude doctor cd your-project claude

แนะนำ: ใช้ native installer บน Linux หรือ npm บน Node.js 18+ และอย่าใช้ sudo npm install -g

# Option 1: native installer curl -fsSL https://claude.ai/install.sh | bash # Option 2: npm install npm install -g @anthropic-ai/claude-code claude doctor cd your-project claude

วิธีใช้งานให้ครบทุกช่องทาง

terminal
CLI / Terminal

เปิด terminal ในโฟลเดอร์โปรเจกต์ รัน claude แล้วเริ่มจากคำสั่งอ่าน-only ก่อน เช่น “อธิบายโครงสร้างโปรเจกต์นี้”

code
VS Code

เปิดโปรเจกต์ใน VS Code แล้วใช้ integrated terminal รัน claude หรือติดตั้ง Claude Code extension เพื่อดู diff และ context ใน editor

desktop_windows
Desktop / Web

ใช้ Claude Desktop หรือ claude.ai/code เมื่อต้องการเริ่มงานจาก UI และเชื่อมกลับไปยัง session ที่กำลังทำงานตามสิทธิ์ของบัญชี

integration_instructions
JetBrains / อื่น ๆ

ใช้ plugin/extension ทางการเมื่อทีมใช้ IntelliJ, PyCharm, WebStorm หรือ IDE ที่รองรับ และยังคงตรวจ diff ก่อนยอมรับทุกครั้ง

ติดตั้ง Claude Desktop

  1. เปิดหน้า Claude downloads แล้วเลือก macOS หรือ Windows ตามเครื่องที่ใช้
  2. macOS ต้องใช้ macOS 11 Big Sur ขึ้นไป ส่วน Windows ต้องใช้ Windows 10 ขึ้นไป
  3. เปิดไฟล์ติดตั้งที่ดาวน์โหลด: macOS ให้ลาก Claude ไปที่ Applications, Windows ให้รัน installer แล้วทำตามขั้นตอนของระบบ
  4. เปิด Claude จาก Applications บน macOS หรือ Start menu บน Windows แล้ว sign in ด้วยบัญชี Claude เดียวกับที่ใช้เรียนหรือบัญชีทีม
  5. ทดลองเปิดแชทใหม่ สร้าง Project หรืออัปโหลดไฟล์ตัวอย่าง เพื่อยืนยันว่า plan และสิทธิ์ของบัญชีพร้อมใช้งาน
  6. ถ้าจะใช้ Desktop extensions ให้เปิด Settings > Extensions เพื่อดู extension ที่เชื่อมไฟล์ ปฏิทิน อีเมล หรือแอปอื่น ๆ ได้ตามสิทธิ์ของบัญชี
  7. แยกให้ออกว่า Desktop extensions ใช้กับ Claude Desktop ส่วน Plugin Pack ในคอร์สนี้ใช้กับ Claude Code และโครงสร้าง .claude ของโปรเจกต์

ติดตั้ง Claude Code Extension ใน VS Code

  1. อัปเดต VS Code เป็นเวอร์ชัน 1.98.0 ขึ้นไป แล้วเปิดโปรเจกต์ที่ต้องการใช้งาน
  2. กด Cmd+Shift+X บน macOS หรือ Ctrl+Shift+X บน Windows/Linux เพื่อเปิด Extensions view
  3. ค้นหา Claude Code แล้วติดตั้ง extension ทางการที่เป็นของ Anthropic
  4. ถ้าไม่เห็น Spark icon หลังติดตั้ง ให้เปิด Command Palette แล้วรัน Developer: Reload Window
  5. เปิดไฟล์ในโปรเจกต์ จากนั้นกด Spark icon มุมขวาบน, Activity Bar, Status Bar หรือ Command Palette แล้วเลือกคำสั่ง Claude Code
  6. Sign in หรือ authorize ใน browser เมื่อ extension ขอสิทธิ์ และทดลอง prompt อ่าน-only ก่อน เช่น “Explain this file”
  7. ก่อนยอมรับการแก้ไฟล์จริง ให้ดู diff/context ใน editor และยืนยันเฉพาะการเปลี่ยนแปลงที่เข้าใจ
# VS Code quick check code --version # Open VS Code from terminal so it inherits env vars when needed code . # In VS Code: Extensions view > search "Claude Code" > Install
extension
เลือกใช้แบบไหนดี

ถ้าทำงานกับโค้ดและต้องเห็น diff ใน editor ให้เริ่มจาก VS Code extension หากต้องการคำสั่งขั้นสูงหรือใช้ editor อื่น ให้ใช้ CLI ใน terminal ส่วน Claude Desktop เหมาะกับงานเอกสาร ไฟล์ และ workflow ผ่าน UI

ตรวจหลังติดตั้ง

claude --version claude doctor claude config list cd your-project claude
terminal
แนวทางใช้งานครั้งแรก

เริ่มจากคำถามอ่าน-only เช่น “อธิบายโครงสร้างโปรเจกต์นี้” หรือ “หาไฟล์ที่เกี่ยวกับหน้า login” ก่อนสั่งแก้ไขจริง

science Practice Lab

Lab 03: ติดตั้งและตรวจ Claude Code ทุกช่องทางLab 03: Install and verify Claude Code across channels

ทำ setup ให้ผ่านจริงบนเครื่องของคุณ แล้วบันทึกว่าควรใช้ CLI, Desktop หรือ VS Code กับ workflow แบบใดComplete setup on your machine and decide when to use CLI, Desktop, or VS Code for each workflow.

1

ติดตั้ง Claude Code ด้วยวิธีที่ตรง OS แล้วรัน claude doctorInstall Claude Code using the method for your OS, then run claude doctor.

2

เปิดโปรเจกต์ทดลองใน CLI และ VS Code extension จากนั้นลอง prompt อ่าน-only 1 ครั้งOpen a practice project in CLI and the VS Code extension, then run one read-only prompt.

3

Expected output: บันทึกวิธีติดตั้งที่ใช้, ผล claude doctor, และช่องทางที่เหมาะกับงานของคุณExpected output: installation method, claude doctor result, and the best channel for your work.

done_all สรุปบทนี้Lesson Summary

  • ติดตั้ง Claude Code ให้ตรง OS และตรวจด้วย claude doctor ทุกครั้งInstall Claude Code for your OS and always verify with claude doctor.
  • Desktop, CLI และ VS Code มีบทบาทต่างกัน ควรเลือกให้ตรง workflowDesktop, CLI, and VS Code each fit different workflows.
  • เริ่มจาก prompt อ่าน-only และอ่าน diff ก่อนยอมรับการแก้ไฟล์Start with read-only prompts and inspect diffs before accepting file edits.
04
API & Security

ตั้งค่า API Key และจัดการความปลอดภัย

API key คือข้อมูลลับที่ใช้เชื่อมต่อบริการ AI ควรเก็บใน environment variable หรือ secret manager และไม่ควรถูก commit เข้า git

แนวทางตั้งค่า

  • สร้าง key จาก console ของผู้ให้บริการ และตั้งชื่อ key ให้รู้ว่าใช้กับโปรเจกต์ไหน
  • บันทึก key ใน .env.local หรือ secret store ที่องค์กรใช้
  • เพิ่ม .env* ลง .gitignore หาก repo ยังไม่มี
  • rotate key ทันทีเมื่อสงสัยว่าหลุดหรือถูก commit
# ตัวอย่าง .env.local ANTHROPIC_API_KEY=ใส่คีย์ของคุณที่นี่ # ตรวจว่าไฟล์ env ไม่ถูก track git status --short

ขั้นตอนทำให้ปลอดภัยก่อนใช้จริง

  1. สร้าง key แยกตาม environment เช่น dev, staging, production และตั้งชื่อให้ระบุ owner ได้
  2. จำกัดสิทธิ์และ budget ตามที่ระบบรองรับ โดย production key ไม่ควรอยู่ในเครื่องส่วนตัวของทุกคน
  3. เพิ่ม .env*, log, export และไฟล์ backup ที่อาจมี secret ลงใน .gitignore
  4. ตรวจ secret ก่อน commit ด้วยเครื่องมือของทีม หรืออย่างน้อยค้นหา keyword เช่น ANTHROPIC_API_KEY, sk-, token
  5. บันทึก owner, วันที่สร้าง, วันที่ rotate ถัดไป และขั้นตอนปิด key เมื่อคนออกจากทีม
key
Local dev

ใช้ .env.local เฉพาะเครื่อง และไม่แชร์ผ่าน chat หรือ screenshot

cloud_done
Production

เก็บใน secret manager หรือ environment variables ของ hosting เท่านั้น

update
Rotation

ตั้งรอบหมุน key และ rotate ทันทีเมื่อสงสัยว่าหลุดหรือถูก commit

receipt_long
Audit

เก็บรายการ key, owner, ระบบที่ใช้ และเหตุผลการสร้าง เพื่อให้ตามรอยได้

# ตรวจไฟล์ที่อาจมี secret ก่อน commit git status --short git diff -- . ":(exclude)package-lock.json" # ค้นหาคำที่มักเกี่ยวกับ secret rg -n "ANTHROPIC_API_KEY|sk-|token|password|secret" .
report
ห้ามทำ

อย่าวาง API key ใน HTML ฝั่ง browser, screenshot, chat สาธารณะ หรือไฟล์ที่ commit เข้า repository

science Practice Lab

Lab 04: ทำ secret hygiene checkLab 04: Run a secret hygiene check

ตั้งกติกา key ให้ใช้งานได้จริงโดยไม่เสี่ยงหลุด และฝึกตรวจ repo ก่อน commit หรือแชร์งานMake key handling usable without leaks, and practice checking a repo before commits or sharing work.

1

สร้างตัวอย่าง .env.local ในโปรเจกต์ทดลอง และยืนยันว่า .env* อยู่ใน .gitignoreCreate a sample .env.local in a practice project and confirm .env* is in .gitignore.

2

รันคำสั่งตรวจ secret ก่อน commit และจดว่าทีมควร rotate/revoke key อย่างไรRun secret checks before commit and document how the team should rotate/revoke keys.

3

Expected output: secret checklist พร้อม owner, environment, rotation date และ revoke pathExpected output: a secret checklist with owner, environment, rotation date, and revoke path.

done_all สรุปบทนี้Lesson Summary

  • API key คือ secret ต้องอยู่นอก source code และแยกตาม environmentAPI keys are secrets and should stay outside source code, separated by environment.
  • ต้องมี owner, รอบ rotate และวิธี revoke เมื่อมีความเสี่ยงEach key needs an owner, rotation cycle, and revoke process.
  • ตรวจ secret ก่อน commit เพื่อกัน key หลุดขึ้น repositoryCheck for secrets before commits to prevent leaking keys into repositories.
05
Plugin Concepts

เข้าใจ Plugins: commands, agents, skills ต่างกันอย่างไร

Plugins ช่วยเปลี่ยนความรู้และ workflow ที่ใช้ซ้ำให้เป็นเครื่องมือเรียกใช้เร็ว ลดการเขียน prompt ยาวซ้ำ ๆ และทำให้ทีมทำงานมาตรฐานเดียวกัน

ภาพประกอบโครงสร้าง Plugin ที่เชื่อม commands agents skills และ context

ส่วนประกอบที่ควรรู้

  • Slash commands: คำสั่งสั้น ๆ เช่น /review, /blog-post, /release-note เพื่อเรียก workflow
  • Agents: ผู้ช่วยเฉพาะทาง เช่น content strategist, code reviewer, QA analyst ที่มีบทบาทชัด
  • Skills: ชุดความรู้ วิธีทำงาน หรือคู่มือที่ Claude อ่านก่อนลงมือทำ task เฉพาะ
  • Project context: ไฟล์คำอธิบายโปรเจกต์ กฎทีม และตัวอย่าง output ที่ช่วยให้ Claude ทำงานถูกแนว

ออกแบบ Plugin ให้ใช้ได้จริง

  1. เลือก workflow ที่มี input/output ชัด และเกิดซ้ำพอที่จะคุ้มกับการทำเป็น plugin
  2. เขียน command ให้สั้น จำง่าย และบอก parameter ที่ต้องใส่ เช่น /review, /campaign-brief
  3. กำหนด agent เฉพาะทางเมื่อ workflow ต้องใช้มุมมองชัด เช่น reviewer, editor, QA, strategist
  4. ใส่ skill เฉพาะงานเฉพาะเมื่อมีคู่มือ กติกา หรือความรู้ที่ต้องอ่านซ้ำทุกครั้ง
  5. กำหนด output contract เช่น ต้องมี summary, risks, checklist, next steps และไฟล์ที่เปลี่ยน
Plugin Design Brief Workflow name: Who uses it: Trigger command: Required input: Agent role: Skills/context needed: Expected output: Quality checklist:
bolt
Command

เหมาะกับงานที่เริ่มด้วยคำสั่งเดียวและมีขั้นตอนตายตัว

support_agent
Agent

เหมาะเมื่ออยากให้ Claude ใช้มุมมองเฉพาะทางและมาตรฐานงานเฉพาะบทบาท

menu_book
Skill

เหมาะกับคู่มือ วิธีคิด ตัวอย่าง และกติกาที่ต้องใช้ประกอบการทำงาน

settings
Hook/MCP

ใช้เมื่อ workflow ต้องเชื่อมเครื่องมือ ตรวจขั้นตอน หรือดึงข้อมูลจากแหล่งภายนอก

extension
ควรเริ่มจากอะไร

เริ่มจาก command ที่ใช้บ่อยที่สุด 3 อย่างของทีม เช่น สรุป meeting, เขียน social post, ตรวจ PR แล้วค่อยเพิ่ม agents/skills เมื่อ workflow นิ่ง

science Practice Lab

Lab 05: เขียน Plugin Design BriefLab 05: Write a Plugin Design Brief

เปลี่ยน workflow ที่ใช้ซ้ำให้เป็น brief สำหรับ plugin โดยแยก command, agent, skill และ output contract ให้ชัดTurn a repeatable workflow into a plugin brief with clear command, agent, skill, and output contract.

1

เลือก workflow ที่ทีมทำซ้ำ 1 งาน แล้วตั้งชื่อ slash command ที่สั้นและจำง่ายChoose one repeated team workflow and name a short, memorable slash command.

2

กำหนด agent role, skill/context ที่ต้องอ่าน และ output contract ที่ตรวจได้Define the agent role, required skill/context, and reviewable output contract.

3

Expected output: Plugin Design Brief 1 ฉบับที่พร้อมส่งต่อไปบทติดตั้งExpected output: one Plugin Design Brief ready for the installation lesson.

done_all สรุปบทนี้Lesson Summary

  • Plugin ที่ดีเริ่มจาก workflow ที่ใช้ซ้ำและมี input/output ชัดGood plugins start from repeatable workflows with clear inputs and outputs.
  • Command, agent และ skill ควรมีหน้าที่แยกกัน ไม่ยัดทุกอย่างไว้ที่เดียวCommands, agents, and skills should have separate responsibilities.
  • Output contract ช่วยให้ทีมตรวจคุณภาพได้เหมือนกันทุกครั้งAn output contract helps the team review quality consistently.
06
Plugin Installation

ติดตั้ง Plugins แบบ Project และ Global

การติดตั้งแบบ project เหมาะกับ plugin เฉพาะ repo ส่วน global เหมาะกับ workflow ส่วนตัวที่อยากใช้ทุกโปรเจกต์

ภาพประกอบชุดไฟล์ LOMA-AGENT.zip สำหรับ Plugins และ Template

เริ่มจากไฟล์ที่ดาวน์โหลด

หลังดาวน์โหลด LOMA-AGENT.zip ให้แตกไฟล์ก่อน ภายในชุดนี้จะมี LOMA-AGENT-PLUGIN สำหรับติดตั้ง plugin และ LOMA-AGENT-TEMPLATE สำหรับเริ่มโปรเจกต์ enterprise template

LOMA-AGENT/ LOMA-AGENT-PLUGIN/ lomaagent-dev-kit/ lomaagent-digital-marketing/ lomaagent-content/ ... LOMA-AGENT-TEMPLATE/ Code/ README.md

โครงสร้าง Plugin ที่จะนำไปวาง

selected-plugin/ .claude-plugin/plugin.json agents/ commands/ skills/ hooks/hooks.json .mcp.json

ติดตั้งในโปรเจกต์

mkdir -p .claude/commands .claude/agents .claude/skills .claude/hooks cp -r LOMA-AGENT-PLUGIN/lomaagent-dev-kit/commands/* .claude/commands/ cp -r LOMA-AGENT-PLUGIN/lomaagent-dev-kit/agents/* .claude/agents/ cp -r LOMA-AGENT-PLUGIN/lomaagent-dev-kit/skills/* .claude/skills/ cp -r LOMA-AGENT-PLUGIN/lomaagent-dev-kit/hooks/* .claude/hooks/ cp LOMA-AGENT-PLUGIN/lomaagent-dev-kit/.mcp.json .mcp.json

ติดตั้งแบบ Global

mkdir -p ~/.claude/commands ~/.claude/agents ~/.claude/skills ~/.claude/hooks cp -r LOMA-AGENT-PLUGIN/lomaagent-content/commands/* ~/.claude/commands/ cp -r LOMA-AGENT-PLUGIN/lomaagent-content/agents/* ~/.claude/agents/ cp -r LOMA-AGENT-PLUGIN/lomaagent-content/skills/* ~/.claude/skills/ cp -r LOMA-AGENT-PLUGIN/lomaagent-content/hooks/* ~/.claude/hooks/

ตรวจหลังติดตั้ง Plugin

  1. เปิด Claude Code ใหม่ในโปรเจกต์ที่ติดตั้ง plugin เพื่อให้โหลด context และ command ล่าสุด
  2. รันคำสั่งอ่าน-only ก่อน เช่น /review แบบให้สรุปแผนหรือรายการไฟล์ โดยยังไม่แก้ไฟล์
  3. ตรวจว่า agent/skill ที่ถูกเรียกตรงกับ workflow ที่ต้องการ และ output มี format ตามที่คาด
  4. ถ้าใช้ MCP หรือ hook ให้ตรวจ log/permission ก่อนให้รันกับไฟล์จริง
claude /help /review ตรวจเฉพาะแผนก่อน ยังไม่ต้องแก้ไฟล์ # ถ้า command ไม่ขึ้น ให้ตรวจ path ls .claude/commands ls ~/.claude/commands

ใช้ Template สำหรับเริ่มโปรเจกต์ใหม่

cd LOMA-AGENT-TEMPLATE/Code copy project.config.example.jsonc project.config.json .\_init.ps1 -Config .\project.config.json pnpm dev
folder_open
เลือกแบบไหนดี

ถ้า plugin ผูกกับ product, codebase หรือมาตรฐานทีม ให้ติดตั้งใน project หากเป็น workflow ส่วนตัว เช่น เขียน daily note หรือสรุปบทความ ให้ติดตั้ง global ส่วน template ใช้เมื่ออยากเริ่มโปรเจกต์ใหม่จากโครง enterprise ที่เตรียมไว้แล้ว

science Practice Lab

Lab 06: ติดตั้ง Plugin Pack จากไฟล์ดาวน์โหลดLab 06: Install a Plugin Pack from the download

ใช้ไฟล์ LOMA-AGENT.zip จริง เลือก plugin ที่เหมาะกับงาน แล้วติดตั้งแบบ project หรือ global พร้อมทดสอบ commandUse the real LOMA-AGENT.zip, choose the right plugin, install it as project/global, and test a command.

1

แตกไฟล์ LOMA-AGENT.zip แล้วเลือก plugin 1 ชุดให้ตรงกับงานหรือบทบาทของคุณExtract LOMA-AGENT.zip and choose one plugin pack for your work or role.

2

ติดตั้งเข้า project หรือ global ตาม guide แล้ว restart Claude CodeInstall it into project or global scope using the guide, then restart Claude Code.

3

Expected output: command แสดงใน /help และทดสอบอ่าน-only ผ่าน 1 ครั้งExpected output: the command appears in /help and one read-only test passes.

done_all สรุปบทนี้Lesson Summary

  • Project plugin เหมาะกับกติกาทีมหรือ repo เฉพาะ ส่วน global เหมาะกับ workflow ส่วนตัวProject plugins fit team or repo-specific rules, while global plugins fit personal workflows.
  • หลังติดตั้งต้อง restart/เปิด Claude Code ใหม่และทดสอบ command แบบอ่าน-onlyAfter installation, restart Claude Code and test commands with read-only work.
  • ถ้า command ไม่ขึ้น ให้ตรวจ path, ชื่อไฟล์ และตำแหน่งโฟลเดอร์ก่อนIf commands do not appear, check paths, filenames, and folder locations first.
07
Real Workflow

นำ Plugins ไปใช้กับงานจริง

เมื่อ plugin พร้อมแล้ว เป้าหมายคือใช้ให้เกิด workflow ที่ทำซ้ำได้ มี input ชัด output ชัด และมีขั้นตอนตรวจคุณภาพก่อนส่งงาน

ตัวอย่าง workflow ที่ควรมี

  • Content: brief → outline → draft → edit tone → social captions → SEO checklist
  • Development: explain codebase → implement scoped fix → run test → summarize diff → PR note
  • Business: summarize meeting → extract decisions → action items → follow-up email
  • Support: classify ticket → draft answer → identify missing info → escalation note

Workflow Playbook ที่ทีมควรมี

  1. นิยาม trigger ว่าจะเริ่ม workflow เมื่อไร ใครเป็นคนเรียก และใช้ข้อมูลจากที่ไหน
  2. ทำ input template ที่บังคับช่องสำคัญ เช่น goal, audience, source, constraint, deadline
  3. กำหนด output format ให้ตรวจง่าย เช่น summary, draft, checklist, risk, next action
  4. เพิ่ม review gate: ใครต้องตรวจอะไร ก่อนส่งลูกค้า ก่อน merge code หรือก่อนเผยแพร่
  5. เก็บตัวอย่าง output ที่ดี 2-3 ชุดไว้ใน skill หรือ project context เพื่อให้ผลลัพธ์นิ่งขึ้น
/blog-post หัวข้อ: วิธีเริ่มใช้ Claude ในทีมขาย กลุ่มเป้าหมาย: sales manager ที่ไม่ใช่สายเทคนิค โทน: มืออาชีพ อ่านง่าย มี checklist ท้ายบทความ /review ตรวจไฟล์ที่แก้ล่าสุด เน้น bug, security risk, missing tests
Reusable Workflow Input Goal: Audience/User: Source files or context: Constraints: Output format: Quality checklist: Reviewer: Deadline:
task_alt
Definition of Done

ทุก workflow ควรจบด้วย “สิ่งที่เปลี่ยน”, “สิ่งที่ต้องตรวจ”, “ความเสี่ยง”, และ “ขั้นตอนถัดไป” เพื่อให้ทีมไม่ต้องเดา

science Practice Lab

Lab 07: สร้าง workflow playbook แรกของทีมLab 07: Create the team’s first workflow playbook

นำ plugin ที่ติดตั้งแล้วไปใช้กับงานจริง 1 งาน และเก็บ input/output ที่ดีเป็น playbook ให้ทีมใช้ซ้ำUse an installed plugin on one real task and save strong input/output as a reusable team playbook.

1

เลือก workflow จริง 1 งาน แล้วเติม trigger, input template, output format และ reviewerChoose one real workflow and fill trigger, input template, output format, and reviewer.

2

รันด้วย plugin/command ที่เลือก แล้วบันทึก output ที่ดีและสิ่งที่ต้องปรับRun it with the selected plugin/command, then save good output and improvement notes.

3

Expected output: workflow playbook 1 หน้า พร้อม Definition of Done และ review gateExpected output: a one-page workflow playbook with Definition of Done and review gate.

done_all สรุปบทนี้Lesson Summary

  • Workflow จริงต้องมี trigger, input template, output format และ review gateReal workflows need triggers, input templates, output formats, and review gates.
  • ตัวอย่าง output ที่ดีช่วยให้ Claude ทำงานซ้ำได้เสถียรขึ้นGood output examples make Claude’s repeated work more consistent.
  • จบงานด้วย summary, risk และ next step เพื่อให้ทีมตัดสินใจต่อได้ง่ายEnd work with summaries, risks, and next steps so the team can act easily.
08
Troubleshooting

แก้ปัญหาและต่อยอดหลังใช้งานจริง

ปัญหาส่วนใหญ่เกิดจาก path ผิด, context ไม่พอ, command กว้างเกินไป หรือไม่ตรวจ output ก่อนใช้จริง บทนี้คือคู่มือเอาตัวรอด

ตารางแก้ปัญหาเร็ว

  • ไม่เห็น command: ตรวจ path, ชื่อไฟล์, restart session, ตรวจว่า command อยู่ใน commands/
  • คำตอบไม่ตรงงาน: เพิ่มบริบท ตัวอย่าง output และข้อจำกัด
  • แก้ไฟล์กว้างเกินไป: ระบุ scope ไฟล์เดียวหรือ module เดียว และให้สรุปแผนก่อนแก้
  • ผลลัพธ์ไม่น่าเชื่อถือ: ขอแยก fact/inference และระบุจุดที่ต้องตรวจจากแหล่งจริง

Runbook เมื่อมีปัญหา

  1. หยุด workflow ก่อน อย่า approve คำสั่งเพิ่มจนกว่าจะรู้ว่าเกิดอะไรขึ้น
  2. เก็บข้อมูล: prompt ที่ใช้, command ที่รัน, path ปัจจุบัน, ไฟล์ที่ถูกแก้, error message และ screenshot ถ้ามี
  3. แยกสาเหตุว่าเป็น path, permission, context, plugin version, API key, network หรือ prompt ไม่ชัด
  4. แก้ทีละจุดและทดสอบด้วย prompt อ่าน-only ก่อนกลับไปรันกับไฟล์จริง
  5. อัปเดต plugin/playbook ถ้าปัญหานั้นมีโอกาสเกิดซ้ำกับคนอื่นในทีม
folder
Path issue

ใช้ pwd, ls และตรวจว่าเปิด Claude Code ใน root โปรเจกต์ถูกที่

lock
Permission issue

ตรวจสิทธิ์ไฟล์ secret, MCP, hook และ command ที่ Claude ขอรันก่อนอนุญาต

subject
Context issue

เพิ่มไฟล์อ้างอิง ตัวอย่าง output และข้อจำกัดให้ครบก่อนให้แก้อีกครั้ง

update
Version issue

ตรวจว่า plugin ที่ใช้เป็นเวอร์ชันล่าสุด และทีมใช้ path/command ชุดเดียวกัน

Troubleshooting Report Issue: Command/prompt used: Current folder: Expected result: Actual result: Files changed: Risk level: Next action:
manage_search
กติกาทีมที่ควรเพิ่ม

ทุก plugin ที่ใช้ในทีมควรมี owner, วิธีใช้งาน, ตัวอย่าง input/output, ข้อห้าม และวันที่อัปเดตล่าสุด

science Practice Lab

Lab 08: ทำ troubleshooting report และปรับ playbookLab 08: Write a troubleshooting report and improve the playbook

จำลองปัญหา 1 เคส เช่น command ไม่ขึ้น, path ผิด หรือ output ไม่ตรง แล้วบันทึกวิธีแก้กลับเข้า playbookSimulate one issue such as missing command, wrong path, or mismatched output, then fold the fix back into the playbook.

1

เลือกปัญหา 1 แบบ แล้วเก็บ prompt, command, current folder, expected/actual resultChoose one issue and capture prompt, command, current folder, expected result, and actual result.

2

แยกสาเหตุเป็น path, permission, context, version หรือ prompt แล้วแก้ทีละจุดClassify the cause as path, permission, context, version, or prompt, then fix one point at a time.

3

Expected output: troubleshooting report 1 ฉบับ และรายการปรับ plugin/playbook ที่ลดปัญหาซ้ำExpected output: one troubleshooting report and a plugin/playbook improvement list.

done_all สรุปบทนี้Lesson Summary

  • เมื่อ workflow มีปัญหา ให้หยุด เก็บข้อมูล และแยกสาเหตุก่อนแก้When workflows fail, pause, collect evidence, and classify the cause before fixing.
  • ปัญหาหลักมักมาจาก path, permission, context, version หรือ prompt ไม่ชัดCommon causes are path, permission, context, version, or unclear prompts.
  • ปัญหาที่เกิดซ้ำควรถูกอัปเดตกลับเข้า plugin หรือ playbook ของทีมRepeated issues should be folded back into the team plugin or playbook.
science Practice Lab

ภารกิจปิดคอร์ส: สร้าง workflow plugin แรกของคุณ

ใช้สิ่งที่เรียนทั้งหมดมาประกอบเป็น workflow หนึ่งงานที่ทีมใช้ซ้ำได้จริง เช่น สรุป meeting, เขียนบทความ, ตรวจโค้ด หรือทำ customer response

1

เลือกงานซ้ำ 1 งาน แล้วนิยาม input ที่ต้องมีทุกครั้ง

2

เขียน prompt template พร้อม role, goal, context, output format และ quality bar

3

ทดสอบกับข้อมูลจริง 2-3 ชุด แล้วแก้ template ให้ผลลัพธ์นิ่งขึ้น

4

บันทึกเป็น command หรือคู่มือใน .claude เพื่อให้ทีมเรียกใช้ซ้ำ

inventory_2 Resource Kit

เครื่องมือสรุปสำหรับกลับมาใช้งานซ้ำ

รวมลิงก์สำคัญของคอร์สและเอกสารใน COURSE-DOCS/ เพื่อให้กลับมาเปิดไฟล์ ดาวน์โหลด template และทบทวน checklist ได้เร็วหลังเรียนจบ

download Download Pack

ดาวน์โหลดไฟล์ LOMA-AGENT.zip ที่รวม Plugin Pack, Enterprise Template และ COURSE-DOCS/ สำหรับเรียนตามบทนี้

เปิดส่วนดาวน์โหลด

science Practice Labs

โจทย์ Lab 00-08 พร้อม expected output สำหรับฝึกทีละบทและใช้เช็กผลงานหลังเรียน

เปิด Practice Labs

description Prompt Template

โครง prompt 6 ส่วนสำหรับงานเขียน วิเคราะห์ สรุป และวางแผน

เปิดบท prompt

folder_copy Plugin Structure

โครงสร้างโฟลเดอร์ .claude สำหรับ commands, agents, skills และ project context

เปิดบทติดตั้ง

verified_user Safety Checklist

กติกาเรื่อง API key, ข้อมูลลับ, การตรวจ output และการกำหนด owner ของ workflow

เปิดบท security
help FAQ

คำถามที่ผู้เริ่มต้นมักเจอ

ต้องเขียนโค้ดเป็นก่อนเรียนไหม expand_more

ไม่จำเป็นสำหรับบทพื้นฐานและการใช้ Claude ทั่วไป แต่บท Claude Code และ plugin จะเข้าใจง่ายขึ้นถ้ารู้จัก terminal, folder และไฟล์ project เบื้องต้น

ควรติดตั้ง plugin แบบ project หรือ global expand_more

ถ้า workflow ใช้เฉพาะโปรเจกต์หรือทีม ให้ติดตั้งใน project เพื่อให้ version และกติกาตรงกัน หากเป็น workflow ส่วนตัวที่ใช้ทุกงาน ให้ติดตั้ง global

ทำไม Claude ตอบไม่เหมือนที่ต้องการ expand_more

มักเกิดจากบริบทไม่พอหรือ output format ไม่ชัด ให้เพิ่มตัวอย่างผลลัพธ์ ข้อห้าม เกณฑ์ตรวจ และขอให้ Claude ถามกลับเมื่อข้อมูลไม่พอ

ใช้ AI แล้วจะปลอดภัยไหม expand_more

ปลอดภัยขึ้นเมื่อมีกติกาชัด: ไม่ส่งข้อมูลลับ, ใช้ env/secret manager สำหรับ key, ตรวจคำตอบก่อนใช้งานจริง และมี owner ดูแล workflow ของทีม

พร้อมเริ่มใช้ Claude แบบเป็นระบบแล้ว

ดาวน์โหลด LOMA-AGENT.zip แล้วเริ่มจากบท 00 ไปทีละบท เมื่อจบแล้วให้สร้าง workflow plugin แรกของทีมจากไฟล์จริงที่ได้รับ

download ดาวน์โหลดไฟล์เรียน
chat ถามปัญหาการติดตั้ง Get setup help